|
One Of The Easier Stamping Techniques Is Using Blender Pens and Inks To Add Colour To Your Rubber Stamped Images. Ann Craig Shows You The Basics That You Will Love Using For Cards And Scrap Pages.
One of the easiest Rubber Stamping Techniques that helps you to create individual cards is to use Blender Pens and Inks to colour parts or all of the stamped images. Do you find colouring in to be a really relaxing past time? I do. It is one of those things that does not take a lot of concentration, but the addition of colour to an image really brings it alive. Have you ever used rubber stamp images that are beautiful, finely etched and detailed, but when you stamped them there was "something missing"? Then read on to see examples and basic instructions on how to use a Blender Pen and your ink pad, and you will discover how to really personalize you cards, gifts and scrap pages with your own choices of colour. Blender Pens allow you to create a watercolour effect by blending the colour source onto the card. That is the intensity of the colour diminishes as the pen continues to blend. Blender pens can be used with Stampin Write® Markers, Water Colour Pencils, Pastels (chalks) or Classic Stampin' Pads, and are a very versatile addition to your craft supplies. Stampin' Up® Blender Pens come in a set of 3 double ended pens. They are cleaned by scribbling on scrap paper until they run clear. The tip will discolour but this will NOT affect the performance of the pen. You can see in the first photo, how the colour blends away. One advantage of using Blender Pens is that you can create many tones of the same colour. So this stamping technique enables you to create both colourful and monochromatic images.

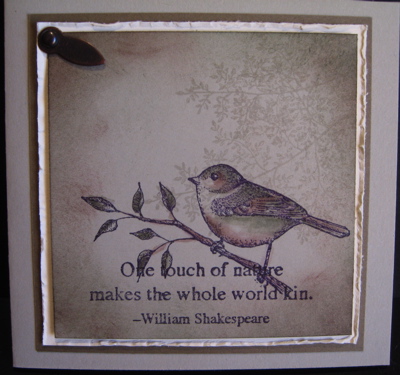
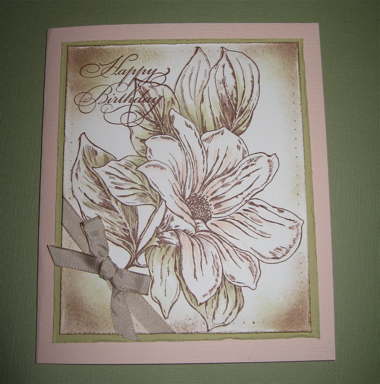
See in this little card how a tiny amount of colour on the bird lifts and personalizes the card. Any colour combination could be used - it doesn't have to be realistic. Having the ability to blend the colour enables you to achieve depth in the images and create focal points in the picture. The large flower image in the next card has been detailed with a Blender Pen and inks. By using this stamping technique and adding just a hint of colour, the image has been changed from a flat graphic, and the colour of the card backing has been echoed in the flower.
This colouring technique is easy to master. The blender pens do all the hard work for you, and the stamp has created an outline that gives you perimeters to work within. We can all become instant artists. There are a couple of things to be aware of when using the Blender Pens. The first is that you need to take care of the tips of the pen. Try very hard not to "scrub" the tip. It will damage and loose its fine point, just like a felt tip pen does when too much pressure or constant scrubbing is used. Be sure to keep the lids on tightly when not using the pen - it will dry out more quickly if exposed to the air for long periods of time when not in use. Remember the tip will stain with colour, but it will not be dirty once you have cleaned it on the scrap paper, and you can change to any other colour with confidence. Always start colouring from a stamped line and blend towards the centre of the shape. Leave a little white at the very least, as this will give life to your shapes. (if you want solid colouring in a shape you are better to use the Stampin Write Markers). Enjoy experimenting with this stamping technique and see what you can achieve. To learn about other stamping techniques, follow this link.
|


