|
The Rubber Stamping Technique Where Pastels Are Applied Over A Versa Mark Image Allows You to Create Soft And Subtle Colour Variations In Your Artwork.
Here is another great rubber stamping technique for you. All you need is a Versa Mark Pad, a set of Pastels or Chalks and some stamps. We made this project at my Opportunity night last night. A few interested ladies and some of my fellow demonstrators got together to answer questions, go through the process of filling out the forms etc. and of course no Stampin' Up Event can occur without some stamping. I made a big effort to use items that new demonstrators may receive in their Starter Kit, and the pastel technique seemed to be a great way to go. The Looks LIke Spring set can be substituted for one of the sets in the kit, and I find the large flower fantastic to demonstrate the versatility of Pastels
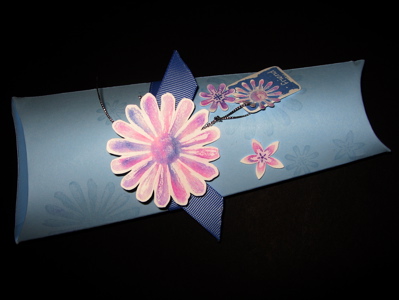
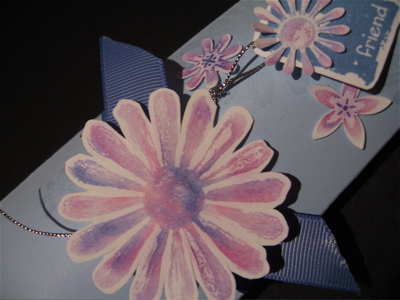
The detail shot shows the lovely subtle variations that are possible when a soft hand is used. Of course it is fine to build up strong plain colour, but you can do that with ink, so I find the ability to build and blend colours is particularly suitable for this rubber stamping technique. It is a good idea to start very softly by applying the lightest colour first and just dusting the pastel over the versa mark image. This will help to define the image shape and give you an idea of the areas that you want to further develop. One of the biggest advantages of this technique is that once you have your set of Stampin' Up! Pastels, you have the whole 48 colours to play with. All you need is a Basic Black ink, a Versa Mark ink pad and some Blender Pens, and you can create a huge variety of projects. I decided to use one of the patterns from the Stampin Up website, to show further variety in the types of projects that can be created. Here is the finished product.

Here is a list of the products used for this cute Pouch Box. One sheet of A4 card stock - Bashful Blue, a scrap of Whisper White Stamp Set - Looks Like Spring Ink - Versa Mark, Ballet Blue Accessories - Stampin' Pastels, Wide Grosgrain Ribbon, Punch - Spring Flower Bouquet, Mini Glue Dots, Sticky Strip. Method Cut out pattern and score all dotted lines Randomly stamp the flower images onto the blue card using Versa Mark. This creates a watermark on the card stock. Stamp the large flower and the cluster using Versa Mark onto White card. Apply 2 or 3 colours using a pastel applicator or an eye shadow sponge to the images on the white card. Start with the lightest colour and gradually build the intensity of colour. Cut or punch out the images. Put Sticky Strip along the side join, and construct the pouch. Tie the ribbon around the pouch - wherever you think it looks best! Use Mini Glue Dots to adhere the main flower to the ribbon, attach the other flowers and a small greeting. There you are finished and it looks great! Contact me to learn more about this rubber stamping technique.
|


